How to Fix Sealed Concrete: Expert Tips and Tricks
Fixing sealed concrete may seem tricky, but it is manageable. In a few steps, you can restore the surface.
Concrete is a tough material, but even sealed concrete can crack or wear out over time. Whether it’s your garage floor, driveway, or patio, knowing how to fix these issues is essential. This guide will walk you through the process of repairing sealed concrete.
You will learn the tools needed and the steps to take. By the end, you’ll have a smooth, durable surface again. Let’s get started!
Sealed Concrete Basics
Sealed concrete is a popular choice for both indoor and outdoor surfaces. It is durable, easy to maintain, and has a polished look. Understanding the basics of sealed concrete can help you maintain its appearance and longevity.
Common Issues
Sealed concrete can face various issues over time. Some of the most common issues include:
- Stains: Spills can cause unsightly stains.
- Cracks: Temperature changes may lead to cracks.
- Peeling: Poor application can result in peeling.
- Discoloration: UV rays may cause fading.
Importance Of Maintenance
Regular maintenance is crucial for keeping sealed concrete in good condition. Here are some reasons why maintenance is important:
- Longevity: Proper care extends the life of the concrete.
- Appearance: Well-maintained surfaces look better.
- Safety: Reduces the risk of accidents due to cracks or peeling.
- Cost-Effective: Prevents expensive repairs in the future.
Simple maintenance tasks can make a big difference. Regular cleaning, prompt spill removal, and periodic resealing are key steps.
Identifying Problems
Identifying problems with sealed concrete is the first step in the repair process. Recognizing issues early can save time and money. This section outlines how to spot damage and understand its extent. By performing a visual inspection and testing for damage, you will know what repairs are needed.
Visual Inspection
Start with a visual inspection of the concrete surface. Look for obvious signs of damage. These might include:
- Cracks
- Discoloration
- Chips or flaking
- Stains
Cracks can indicate structural issues. Discoloration may point to water damage. Chips and flaking suggest the seal is wearing off. Stains could mean the seal is compromised. Use a flashlight to examine all areas, including corners and edges.
Testing For Damage
After the visual inspection, test for damage. Here are some methods:
- Water Test: Pour water on the surface. If it soaks in, the seal is damaged.
- Tap Test: Tap the surface with a hammer. Listen for hollow sounds indicating voids or delamination.
- Scratch Test: Use a metal object to scratch the surface. If it scratches easily, the seal is weak.
Document all findings to plan the repairs. A combination of visual and physical tests will provide a clear picture of the damage.
Necessary Tools
Fixing sealed concrete can seem daunting without the right tools. With proper equipment, the process becomes manageable. Let’s explore the necessary tools you’ll need for the job.
Essential Equipment
Having the right tools makes the task easier and more efficient. Here are the essential items you should gather:
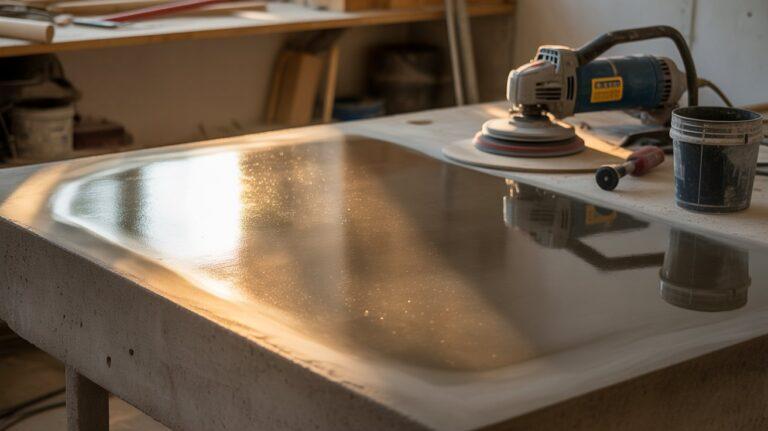
- Concrete Grinder: A concrete grinder helps smooth out the surface.
- Scrub Brush: Use a stiff-bristled scrub brush to clean the concrete.
- Pressure Washer: This tool is crucial for removing dirt and grime.
- Sealer Remover: A chemical sealer remover breaks down old sealer.
- Bucket: Use a bucket to mix cleaning solutions.
- Paint Roller: A paint roller is useful for applying new sealer.
Safety Gear
Safety should always come first. Ensure you have the necessary protective gear before starting:
- Gloves: Protect your hands from chemicals and rough surfaces.
- Safety Goggles: Shield your eyes from debris and chemicals.
- Face Mask: Prevent inhalation of dust and chemical fumes.
- Knee Pads: Protect your knees when working on the ground.
- Protective Clothing: Wear long sleeves and pants to cover your skin.
Having the right tools and safety gear ensures a smooth and safe repair process. Gather these items before you begin fixing your sealed concrete.

Credit: www.reddit.com
Surface Preparation
Fixing sealed concrete involves cleaning the surface thoroughly, repairing cracks, and reapplying a suitable sealer. Proper preparation ensures the new seal adheres well and lasts longer.
Preparing the concrete surface is crucial for effective repair and sealing. Proper preparation ensures the new seal adheres well. It also helps in extending the lifespan of the concrete. Two main steps in surface preparation are cleaning and repairing cracks.
Cleaning Methods
First, remove all debris and dirt from the surface. Use a broom to sweep away loose particles. Next, apply a concrete cleaner to remove stains. Scrub the surface with a stiff-bristle brush. Rinse with clean water and let it dry completely.
Repairing Cracks
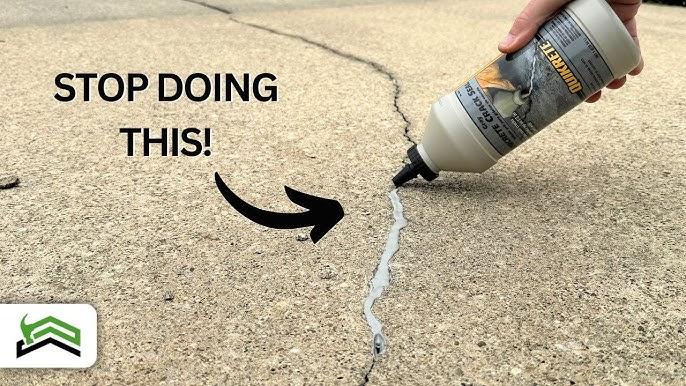
Inspect the concrete for any visible cracks. Use a chisel to widen the cracks slightly. This helps in better filler adhesion. Clean out any loose debris from the cracks. Apply a concrete crack filler using a caulking gun. Smooth the filler with a putty knife. Allow the filler to dry as per the product instructions.
“`
Choosing The Right Sealant
Sealing concrete is crucial to maintaining its durability and appearance. Choosing the right sealant ensures long-lasting protection. But with many options available, how do you make the best choice? Understanding the different types of sealants and what factors to consider can help you make an informed decision.
Types Of Sealants
There are various types of sealants for concrete, each with unique benefits. Here are some common types:
- Epoxy Sealants: These provide a strong, durable surface. Ideal for high-traffic areas.
- Polyurethane Sealants: Flexible and resistant to wear. Best for surfaces exposed to chemicals.
- Acrylic Sealants: Easy to apply and dries quickly. Suitable for decorative concrete.
- Penetrating Sealants: Soak into the concrete for deep protection. Great for exterior surfaces.
Factors To Consider
Choosing the right sealant involves evaluating several factors:
| Factor | Description |
|---|---|
| Surface Type | Identify if it’s interior or exterior concrete. |
| Traffic Level | Consider the amount of foot or vehicle traffic. |
| Exposure | Determine exposure to chemicals, water, or UV rays. |
| Application Method | Check if you need a spray, roller, or brush application. |
| Drying Time | Consider how quickly the sealant needs to dry. |
By understanding these factors, you can select a sealant that best fits your needs. Whether you choose epoxy, polyurethane, acrylic, or penetrating sealants, ensuring you match the sealant type to your specific requirements is key.
Application Techniques
Fixing sealed concrete can be a challenge. Proper application techniques ensure the longevity and appearance of your concrete surfaces. Let’s dive into some effective methods for applying sealant and ensuring proper drying and curing.
Applying Sealant Evenly
Apply the sealant in small sections. This prevents it from drying out too quickly. Use a roller or sprayer for an even coat. Ensure every part of the surface is covered. Overlap each stroke slightly. This helps avoid missed spots. Thin layers work best. They dry faster and more evenly. Thick layers can trap air and cause bubbles.
Check for any missed areas. Touch them up promptly. Inspect the surface from different angles. This helps you spot any unevenness. Work in a systematic pattern. This ensures you don’t miss any sections. Patience is key. Rushing can lead to mistakes and uneven coverage.
Drying And Curing
After applying the sealant, allow it to dry. This can take several hours. Avoid walking on the surface during this time. Curing is different from drying. It takes longer and ensures the sealant bonds well. This process can take up to 48 hours. Keep the area free from dust and debris.
Maintain a controlled environment. Temperature and humidity affect curing. Ideal conditions are between 50°F and 90°F. Keep the surface protected from rain. Water can affect the curing process. Use barriers if necessary. This ensures a strong and durable seal.
Common Mistakes
Fixing sealed concrete requires careful attention. Many people make common mistakes that can lead to bigger problems. Understanding these mistakes can save time and effort. Let’s look at two major mistakes: over-application and preventing bubbles.
Avoiding Over-application
Over-application of sealer is a frequent issue. Using too much sealer can create a thick, uneven layer. This can result in a cloudy or whitish appearance on the concrete surface. To avoid this, follow the manufacturer’s instructions. Apply thin, even coats and allow each coat to dry properly before adding another.
Here is a simple table to guide you on the right amount of sealer to use:
| Concrete Area (sq ft) | Sealer Amount (gallons) |
|---|---|
| 100 | 1 |
| 200 | 2 |
| 300 | 3 |
Using the right amount of sealer ensures a smooth finish. It also prevents waste and saves money.
Preventing Bubbles
Bubbles in the sealer can ruin the look of your concrete. They often form due to trapped air or improper application. To prevent bubbles, follow these steps:
- Use a high-quality roller or sprayer.
- Apply the sealer in a well-ventilated area.
- Work in small sections to ensure even coverage.
- Roll or spray slowly to avoid trapping air.
By following these steps, you can achieve a smooth, bubble-free finish.
Both over-application and bubbles can be avoided with the right techniques. Remember to follow instructions and work carefully. Your concrete will look better and last longer.

Credit: www.reddit.com
Long-term Care
Maintaining sealed concrete can extend its life and keep it looking fresh. Long-term care involves regular maintenance and timely re-sealing. This ensures your concrete remains protected and attractive. Here are some essential tips for long-term care.
Regular Maintenance Tips
Regular maintenance is key for sealed concrete. Sweep the surface to remove dirt and debris. Use a soft-bristle broom to avoid scratching. A gentle power wash can help remove stubborn stains. Avoid using harsh chemicals that can damage the sealant.
Inspect the concrete for any signs of wear or damage. Address small issues before they become big problems. Clean spills immediately to prevent staining. Use mild soap and water for cleaning. Rinse thoroughly to remove any soap residue.
Re-sealing Schedule
Re-sealing is crucial for maintaining sealed concrete. The frequency of re-sealing depends on usage and exposure. High-traffic areas may need re-sealing every 1-2 years. Low-traffic areas can go 2-3 years before re-sealing.
Choose a high-quality sealant for the best results. Follow the manufacturer’s instructions for application. Ensure the surface is clean and dry before re-sealing. Apply the sealant evenly for a uniform finish. Allow the sealant to cure properly before using the area.

Credit: www.youtube.com
Frequently Asked Questions
How Do You Clean Sealed Concrete?
To clean sealed concrete, use a mild detergent mixed with water. Mop the surface gently. Avoid harsh chemicals. Rinse thoroughly with clean water. Let it dry completely.
Can You Reseal Concrete Yourself?
Yes, you can reseal concrete yourself. Clean the surface first. Apply a new sealer using a roller or sprayer. Follow the manufacturer’s instructions.
How Often Should Sealed Concrete Be Resealed?
Sealed concrete should be resealed every 2-3 years. This depends on wear and tear. Regular maintenance can extend its life.
What Are The Signs Of Worn-out Sealer?
Signs of worn-out sealer include a dull appearance, staining, and water absorption. If water no longer beads up, it’s time to reseal.
Conclusion
Fixing sealed concrete can be simple with the right steps. Clean and dry the surface first. Apply a new sealant carefully. Use a brush or roller for even coverage. Let it dry completely before use. Regular maintenance keeps concrete in good condition.
Follow these tips for a long-lasting seal. Enjoy a smooth, protected concrete surface. Your concrete will look great and last longer.

Hi Friends, I’m SealerMrinal, your go-to expert for all things sealing. With years of hands-on experience across a wide range of materials—concrete, wood, metal, and more—I bring deep knowledge and practical insights into every sealing project. On my website, I share expert tips, proven techniques, and product recommendations to help you get the best results. Whether you’re tackling a DIY project or seeking professional-grade advice, I’m here to guide you through the art and science of effective sealing.

