How to Smooth Out Dried Silicone Sealant: Quick Fixes!
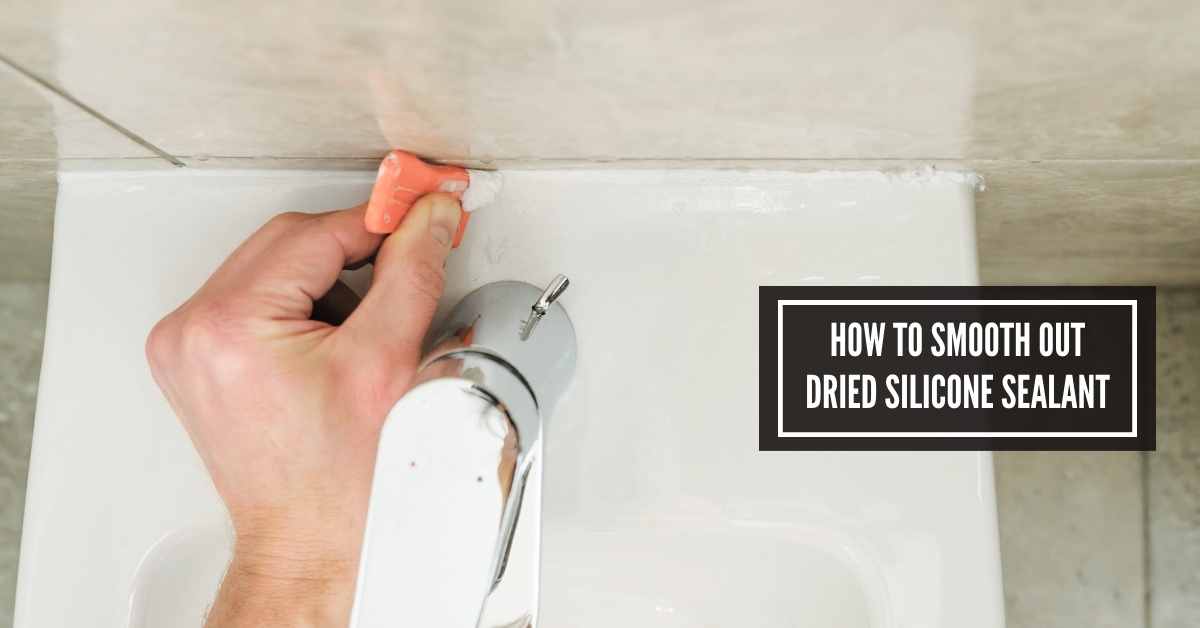
To smooth out dried silicone sealant, gently scrape off excess with a plastic tool and polish the area using a silicone sealant smoother. A flawless silicone seal finish is essential for both aesthetic appeal and functional seals in kitchens, bathrooms, and various other household areas.
Dealing with silicone can be tricky, especially once it’s dried, but achieving a professional-looking finish is possible with the right technique. Quick and precise action can make the difference between a messy sealant line and one that looks expertly applied.
Whether you’re sealing fixtures for the first time or looking to improve upon a previous job, knowing how to smooth silicone seamlessly is a valuable skill. This guide will equip you with practical tips to ensure your silicone sealant application is smooth and clean, enhancing the durability and effectiveness of your seals.
Common Problems With Dried Silicone Sealant
Dried silicone sealant can yield unsightly results. Bumps, cracks, and uneven lines often challenge DIY enthusiasts.
| Issue | Consequence | Solution Needed |
|---|---|---|
| Uneven application | Unattractive finish | Smoothing |
| Dirt accumulation | Unsanitary conditions | Cleaning |
| Cracking or peeling | Possible leaks | Repair or replacement |
Assessing The Situation
Tackling a project involving dried silicone sealant starts with a clear assessment. Recognize whether a repair suffices or a full replacement is necessary. Gauge the deterioration level of the silicone to ensure the best course of action. Proper assessment saves time and promotes long-lasting results.
When To Repair Vs. Replace Dried Silicone
Inspect the sealant around sinks, tubs, and windows. Check for cracks, peeling, or shrinkage. Here are guidelines to decide:
- Repair if it’s a small area with minimal damage.
- Replace if the sealant is extensively damaged.
Evaluating The Extent Of Sealant Deterioration
A close look at the silicone will reveal its condition. Consider these points:
| Severity | Action Needed |
|---|---|
| Mild | Surface cleaning or minor touch-ups |
| Moderate | Patching with new silicone |
| Severe | Complete removal and reapplication |
Determine the severity of the wear and tear. Mild issues might require a simple clean and repair. Severe deterioration demands a full replacement for the best seal and finish.
Quick Fixes For Smoothing Out Dried Silicone
Over time, silicone sealant can dry and become rough. Don’t worry if you missed smoothing it out while it was wet. There are effective ways to fix this. Let’s explore quick and easy methods to smooth out dried silicone for a professional-looking finish.
Simple Surface-level Smoothing Techniques
Even after silicone sealant dries, you can sometimes make it look better. A razor blade can remove bumps from the surface. Gently scrape along the sealant, taking care not to damage surrounding areas. Sandpaper with a fine grit can also smooth out silicone. For a smooth, even surface, lightly sand in a single direction.
Using Household Items For Minor Adjustments
Minor imperfections don’t always require special tools. A simple spoon or ice cube can reshape silicone. Press the spoon against the sealant with light, steady pressure. The back of the spoon molds silicone effectively. Ice cubes, on the other hand, are helpful because silicone doesn’t stick to them. This allows for gentle smoothing without pulling away the material.
- Dip the ice cube in soapy water for better results.
Commercial Products For Silicone Sealant Restoration
For tougher jobs, consider commercial products. Sealant smoothers are available, specifically designed for this purpose. Apply the product as directed, and it will help dissolve the silicone’s rough edges. Additionally, silicone removers can soften the entire sealant area for reapplication, if needed.
- Read product instructions carefully before use.
- Always ensure proper ventilation when using chemicals.
Remember: Safety is key. Use gloves and eye protection when working with sharp tools and chemicals. Time and patience will yield the best results.

Detailed Repair Procedures
Silicone sealant adds a waterproof barrier, but over time, it may dry and crack. Smoothing out dried silicone ensures a strong, protective seal. Follow this repair guide for the best methods.
Step-by-step Guide To Soften And Smooth Silicone
Revitalizing old silicone sealant involves several steps:
- Assess the area. Remove loose debris with a putty knife.
- Wear gloves for protection. Silicone can be messy.
- Apply a silicone sealant remover. Let it sit.
- Scrape gently. The product will soften the silicone.
- Use a damp cloth to clean the surface.
- Allow the area to be completely dry.
- Apply new silicone. Smooth it with a damp finger or tool.
Applying Heat: A More Intensive Approach
- Heat guns can be used to soften tough silicone.
- Keep the nozzle moving to avoid damage.
- Aim the heat gun at the sealant. Keep it at a safe distance.
- Once softened, remove the silicone carefully.
Safety Considerations During The Repair Process
Ensure safety at all times. Here are key points:
- Always work in a well-ventilated space.
- Use gloves and safety glasses.
- Read instructions on all products.
- Keep heat sources away from flammable materials.
- Never leave the heat gun unattended while on.
Preventive Measures And Best Practices
Ensuring your silicone sealant application is smooth and professional starts with prevention—getting it right from the beginning. Let’s explore some essential tips to prevent silicone sealant from drying out unevenly, keep it maintained over the long term, and be sure you’re using the most suitable product for your project.
How to Prevent Silicone Sealant from Drying Out Unevenly
How To Prevent Silicone Sealant From Drying Out Uneven
Keeping your silicone application even is crucial. Consider these steps:
- Clean the surface to remove dirt and grime.
- Tape both sides of the seam to create a boundary.
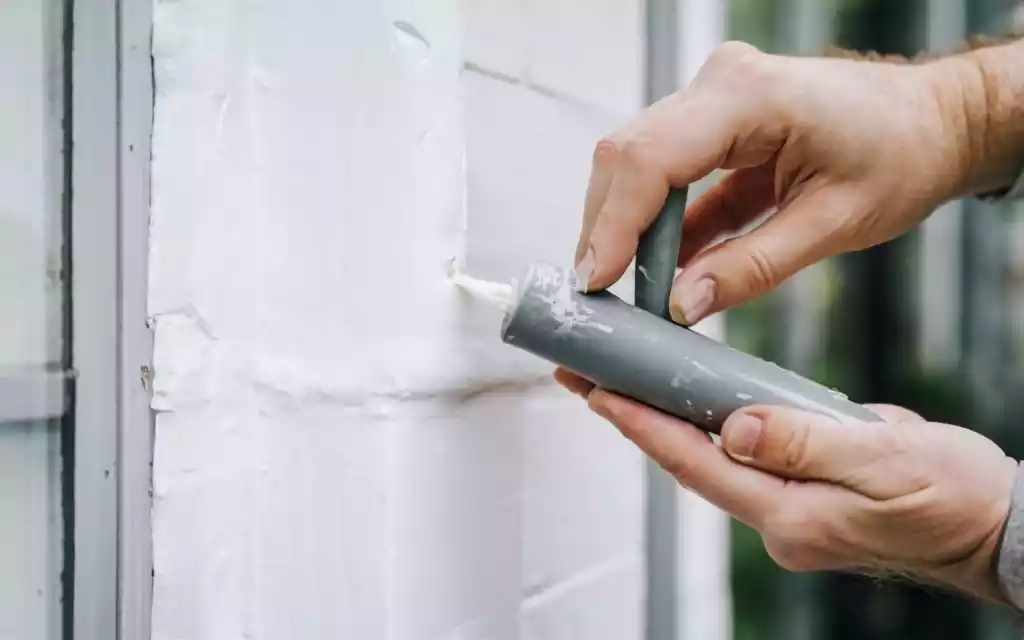
- Apply silicone carefully and ensure even pressure.
- Smooth the sealant with a wet finger or tool before it dries.
- Remove the tape while the silicone is still wet.
Long-Term Maintenance Tips
Long-term Maintenance Tips
Maintaining silicone sealant is simple with these practices:
- Inspect the sealant regularly for signs of wear.
- Clean the area with mild soap and water periodically.
- Reapply sealant as necessary to prevent issues.
Choosing the Right Silicone Sealant for the Job
Choosing The Right Silicone Sealant For The Job
Selecting the right silicone sealant could make or break your project. Follow these tips:
| Application | Type of Silicone Sealant |
|---|---|
| Bathroom | Mold and Mildew Resistant |
| Windows | Exterior-Grade |
| High-Temperature | Heat Resistant |
Always check the label for the manufacturer’s recommendations and match the sealant to the specific conditions of your job.
Recap Of Smoothing Techniques for Dried Silicone Sealant
As our journey to seamlessly smooth out dried silicone sealant concludes, practical takeaways emerge. These final thoughts ensure you’re left with a clear understanding and can confidently approach any sealant smoothing project.
Refreshing memories, we recall key techniques that make silicone sealant look flawless. We discussed careful tool selection and the art of the fingertip tool. The use of soapy water stood out, making hands glide effortlessly. A quick revision:
- Choose the right tool, like a spatula or sealant smoother.
- Wet your finger and glide over the bead for a natural finish.
- Keep soapy water at hand to prevent sticking.
The Importance Of Regular Maintenance
Maintenance keeps sealant working long-term. Neglect can lead to cracks and mold growth. Simple steps help:
- Inspect sealant lines periodically.
- Clean off any mold or mildew promptly.
- Apply new sealant when necessary.
Consistent upkeep means less work and better performance over time.
Frequently Asked Questions
How Do You Smooth Out Silicone After It Dries?
To smooth dried silicone, gently sand it with fine-grit sandpaper. Always wear a mask to avoid inhaling particles, and wipe the area clean afterward.
How Do You Fix Bumpy Silicone?
To fix bumpy silicone, first smooth it with a damp finger or silicone smoothing tool. If cured, gently sand the area with fine-grit sandpaper, then apply a new silicone layer. Always ensure the surface is clean and dry before reapplying.
What Is The Trick To Smoothing Silicone?
To smooth silicone, apply soapy water as a lubricant and glide a tool like a spatula or your finger along the surface to achieve a neat finish. Wear gloves for a clean job and to protect your skin.
Can Silicone Be Smoothed?
Yes, silicone can be smoothed out. You can use a wet finger, a damp cloth, or a smoothing tool for a professional finish.
Can Vinegar Soften Dried Silicone?
Vinegar can slightly soften silicone but isn’t always effective as a sole method for removing fully cured silicone sealant.
Conclusion
Wrapping up, smoothing out dried silicone sealant is a straightforward task with the right technique and tools. By following the steps outlined in this guide, anyone can achieve a professional-looking finish. Remember, patience and precision are key to a flawless result.
Keep this post handy for your next DIY project to ensure success every time.

I am Robert Sandin, a professional sealing expert with a diverse range of expertise. From concrete to various other materials, I possess in-depth knowledge and experience in the art of sealing. On my website, I offer valuable tips and expert recommendations on sealing techniques and products for different materials. Whether it’s concrete, wood, metal, or more, I am committed to providing you with the guidance you need for successful sealing projects.