How To Tell If Prop Seal Is Leaking? The Warning Signs
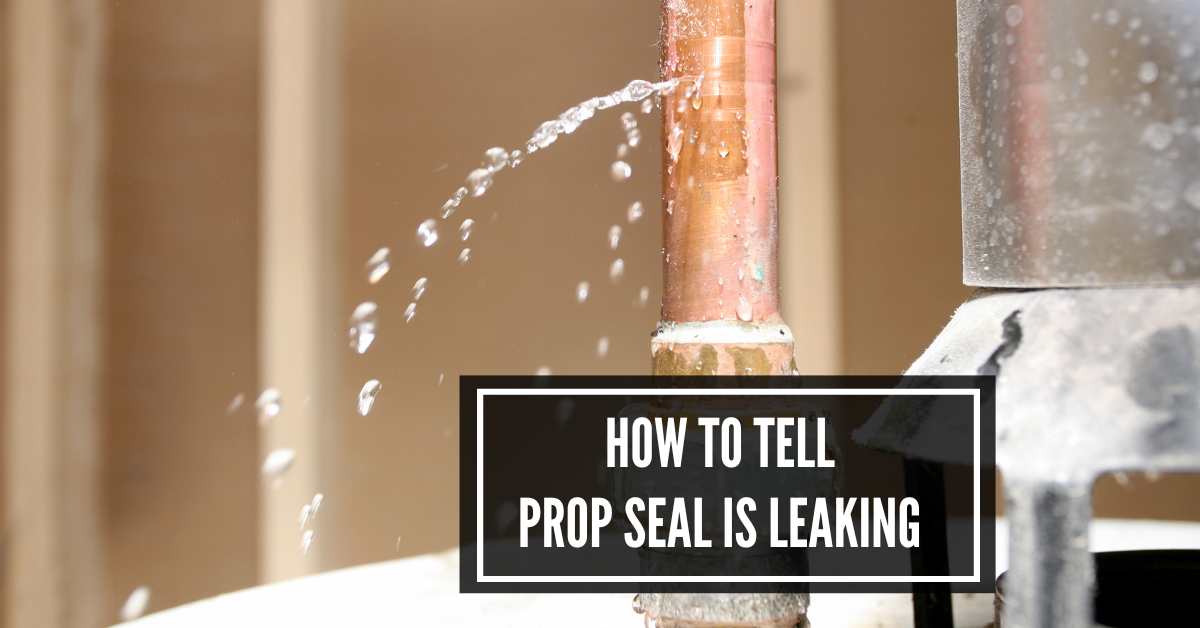
Marine vessels, especially boats, and ships, have a propeller shaft seal or prop seal to prevent water from getting inside the ship through the shaft. This seal also helps keep the oil inside the propeller shaft and allows the shaft to spin freely and smoothly.
But the shaft may fail to perform its function correctly if there is any leakage. How to tell if prop seal is leaking? It is likely to show one or several signs of leakage. If you need clarification, go through this article for a complete idea.
How To Tell If Prop Seal Is Leaking Before It’s Too Late?
It doesn’t matter the type of propeller shafts your boat or ship has.
It is likely to show one or several symptoms if the prop seal has any leak.
The followings are the common signs of prop seal leakage.
i) Excessive Water in Bilge
Do you know the lowest inner part of a ship? It is a bilge whose job is to collect excess water.
It should be fine when you see small amounts of water in the bilge.
But when it has excessive water, it can be a sign of prop seal leakage.
ii) Too Much Noise or Vibration
Do you notice too much unusual noise or vibration while the propeller shaft spins?
Any leak or damage in a prop seal will make the shaft unbalanced.
iii) Grease or Oil in The Water
Is there any oil or grease in the water around the propeller?
It is likely to be a leak in the prop seal. The oil might be coming through the internal piston.
iv) Higher Water Level
Are you struggling to pump out water from the bilge? Is its water level consistently high or rising compared to the average period?
If the float switch level has increased significantly, it could indicate a leaking prop seal.
v) Lower Fuel Efficiency
Has the speed of your boat or ship reduced significantly? Is it consuming more fuel than before?
If so, it is worth inspecting the prop seal to see its current condition.
Common Causes of A Leak Propeller Shaft Seal
a) Damaged Seal Material
Regardless of what type of propeller shaft seal you use, it will degrade after a certain time.
One of the primary reasons for early wear-out issues is friction.
It generates heat and mechanical stress. This will reduce the effectiveness of the seal over time.
b) Dry Running
A lack of lubrication will make the sealing material dry. It also increases friction during rotation.
Dry running for an extended period will lead to a reduced seal lifespan. You will have to replace the sealant more frequently.
c) Excessive vibration and shocks
Does your propeller shaft generate too much vibration? A fluctuating load on the propeller blades can cause this problem.
Also, if the shaft bearings are significantly damaged, they can trigger this issue.
If you don’t fix this problem on time, it will degrade the propeller shaft seal quality.
d) Improper Installation
Have you followed the correct installation technique to install the seal? Did you align the seal properly with the propeller shaft?
A lack of lubricant or too low torque on fasteners can compromise the seal’s integrity and contribute to leaks.
How To Fix Prop Seal Leaking?
Wondering how to repair prop seal leak? The followings are the steps you want to follow to fix a propeller shaft seal leak.
Step: 01— Removing the Older Seal
Do you want to replace prop seal? If so, you must remove the older seal first.
You can use this Pick tool to take out the seal that is getting wrapped around the shaft.
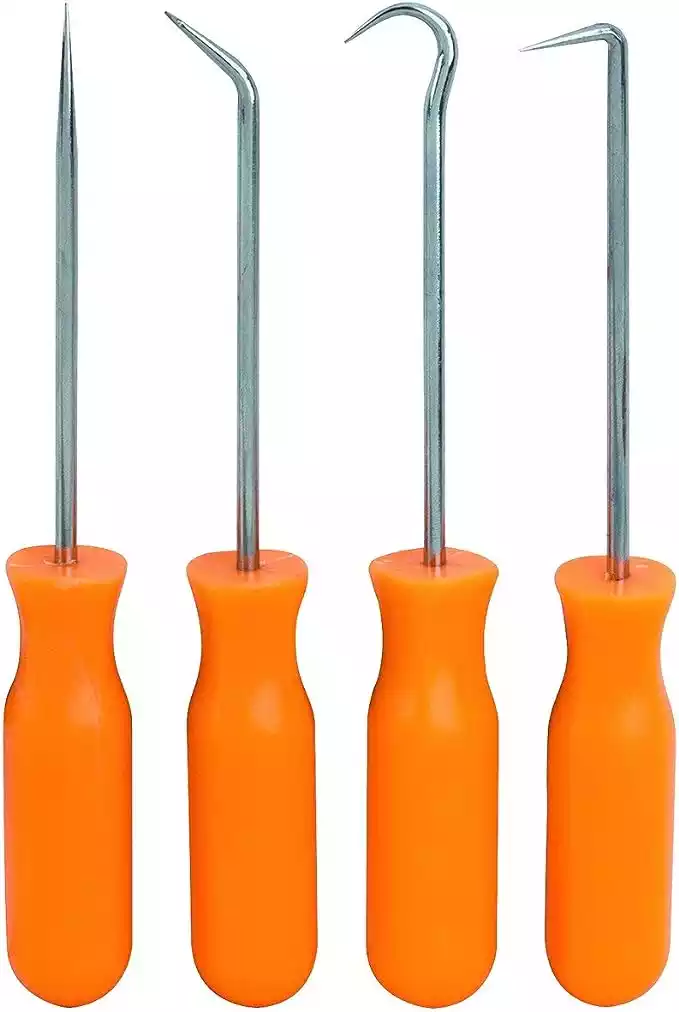
You should not sweat if the seal is damaged. Carefully remove the older seal to avoid marring or scratching the propeller shaft.
The seal has a metal case inside. Press the hook’s tip securely with a bit of force to take out the seal after it is appropriately engaged.
Step: 02— Removing the Older Seal (Additional Task)
You may need some elbow grease if the seal is a little older.
Does the seal a little bit tight? Use a lever to pry or push against the seal to create the necessary force for removal.
Are you still failing to move the propeller shaft seal? You can heat around the rim of the seal and expand the expand section. Dislodge the seal once it has been heated.
Step: 03— Cleaning the Bore
Does the central opening or hole through which the propeller shaft passes have a lot of dirt?
Before adding the seal, cleaning the bore properly to remove dirt, debris, oil residue, or other contaminants is a good rule of thumb.
The seal will be able to form a tight and secure fit. So, what cleaning product should you use?
You can use brake cleaners or mineral spirits. They are effective in removing grease and other build-up.
Apply the solution on a cotton swap. This will help you work on hard-to-reach spaces effortlessly and ensure easy removal of contaminants.
Step: 04— Protecting the Shaft
The quality of the seal might be compromised when the seal is directly contacted with the splines. You want to create a barrier between the seal and the splines.
Wrap a thin layer of masking or painter’s tape around the lower section of the splines as well as the upper section.
The seal will have a minimum chance of leaking while you install it. However, correctly wrapping the tape is essential to maintain consistency and avoid imbalanced wrapping.
Step: 05— Protecting the Shaft
Grab your new seal and apply a small amount of Vaseline on the inner lip of your new seal as well as the upper section of the shaft cover.
This will help the seal to make smooth contact with the shaft or bore and reduce friction during installation.
But don’t apply any Vaseline on the lower section of the shaft cover. The Vaseline will be pushed when the seal is pushed from the upper section to the lower section.
Also, adding Vaseline to the outer area of the shaft cover is unnecessary.
Step: 06— Protecting the Shaft
To properly install the seal, use a deep socket that matches the diameter of the seal. Push the seal down into the bore.
If the seal is a bit hard to push down, you can use a plastic-tipped hammer to control your force application and reduce the risk of distortion.
Be cautious while tapping the seal down. It should not pass the cover surface of the propeller shaft. Otherwise, it will be damaged, and you will have to get a new one.
Learn More: Best Sealant for Boat Hatches: Leak-Proof Your Vessel!
FAQ’s
Can I Temporarily Use A Sealant to Fix A Leaking Prop Seal?
Using a sealant as a temporary fix for a leaking prop seal is not recommended. While it may seem like a quick solution, sealants are unlikely to provide a reliable and long-lasting repair.
How Often Should I Inspect My Prop Seal?
Regular inspections of the prop seal should be conducted before and after each boating season. Additionally, it’s a good practice to check the seal during routine maintenance checks visually or if you notice any unusual signs, such as oil spots or increased oil consumption.
Can I Continue Using My Boat with A Leaking Prop Seal?
It is not advisable to continue using your boat with a leaking prop seal. A leaking seal compromises the watertight integrity of the engine compartment, which can result in water entering critical components, leading to damage or failure.
Are All Prop Seals the Same?
No, prop seals can vary in design, material, and quality. Choosing a prop seal that is compatible with your boat’s make and model and meets the manufacturer’s specifications is essential.
Verdict
We often overlook the importance of changing a propeller shaft seal on time. It increases the chance of fluid leakage, loss of lubrication, and failure of the propeller shaft or related systems.
This may reduce the machine’s efficiency and lead to costly repairs. Make sure regularly inspect all the essential parts of the propeller shaft. Don’t forget to lubricate it regularly.
Propeller shaft seals usually last around five years on average. But it can be more or less depending on how you install and take care of them. Hopefully, you got a clear idea of how to tell if prop seal is leaking.

I am Robert Sandin, a professional sealing expert with a diverse range of expertise. From concrete to various other materials, I possess in-depth knowledge and experience in the art of sealing. On my website, I offer valuable tips and expert recommendations on sealing techniques and products for different materials. Whether it’s concrete, wood, metal, or more, I am committed to providing you with the guidance you need for successful sealing projects.